Thursday, December 25, 2014

Happy Christmas!

Or is that "Merry"?

At any rate, I hope that all reading this had a safe and pleasant Christmas Day, whether you went all out and celebrated, or just chilled.

Myself--I "celebrated" by making new polishes!  I hadn't designed any Christmas polishes since 2012 (and photos of them are around...somewhere) so I decided to help myself get into the Christmas spirit after a challenging fall, which consisted of relocating.

I knew I wanted to do a colorful, color-filled set, something bright and bold.  So in the end, I decided to go with yellow, green, blue, and red! Each polish consists of a mixture of at least six types of glitter, each.  One has a tinted base; the others have clear bases.  Three feature holo glitter; all but one feature round glitter of some type.

When I decided to name these, I thought, "Why not name them after some of the Christmas songs that pop into my head around this time of year?"


So, I called it the "Christmas Music" collection!

Left to right: Five Golden Rings, Ageless & Evergreen, Pretty Ribbons, Give Love on Christmas

Five Golden Rings is named after the song, "The Twelve Days of Christmas."  It consists of lots of holo gold and silver glitter in a variety of sizes and shapes, tiny yellow stars, little gold stars, and lots of yellow--"golden"--rings.

Ageless & Evergreen isn't named after a Christmas song, but the song it WAS named after has always reminded me of Christmas, maybe because the word "evergreen" reminds me of Christmas.  It's made up of about five different sizes and finishes of round dot glitter, smaller hexes, metallic glitter, and a handful of large pastel and neon hexes thrown into the mix.

Pretty Ribbons is named after a song I heard a lot growing up.  I'm not a fan of country music, but I can tolerate the song this time of year.  Why not use it for this polish, which consists of a shimmery blue-tinted base, with an assortment of blue glitters in different sizes and shapes, including light blue bows, and iridescent glitter?

Give Love on Christmas is named after a holiday song that I DO like a lot and play all the time.  It consists of crushed candy cane-esque red and white glitter, multicolored holographic glitter, and a few neon pink and red satin hearts.  I think this one might be my favorite of the four, and I can't WAIT to wear it!

I've swatched them all on a color ring, and I plan to swatch them for day-to-day testing on my actual fingertips soon.  Unfortunately, I couldn't label them, as I haven't yet located the power cord for my printer--it could be in one of the dozens of boxes I have remaining to unpack.  But the virtual labels are just as cute as real ones, I think!

Tuesday, December 23, 2014

Another USPS Failure

For the LIFE of me, I don't understand how the USPS is still in business.  All package carriers have proven untrustworthy and reliable several times over with me, but I honestly believe that out of all the major ones I can recall right off hand, the United States Postal Service is the ABSOLUTE WORST.

One of my packages is still God only knows where (the where being Atlanta) after it was supposed to be delivered by the USPS carrier three days ago.  And one of the packages that DID arrive today came damaged.  I know full well the merchant did NOT send this box to me this way; this item was damaged in transit.  Someone at one of the post offices definitely kicked it, because the cardboard is pretty sturdy, and some true FORCE had to be behind this.

At this point I don't know if I should open the box and see if the contents are undamaged, or just take it back to the post office and file a claim.  I understand that this time of year things can get hectic for them, but honestly, the way our economy is right now, they ought to be glad they even HAVE a job.  If they don't like the work they're doing then they owe it to themselves to leave and find something better, but they ABSOLUTELY SHOULD NOT take it out on people's parcels!

It arrived at my doorstep this way:


THIS is just disrespectful!  Priority mail?  Priority mail???  Looks like the only priority the postal folks had was to make sure they inflict as much damage to my box as possible

The treatment that packages get by services is a LARGE part of the reason why I don't like selling--anything--online.  Between late and lost packages, damaged packages, packages that look as if they've been opened before they arrive (I've gotten plenty of those as well, not only boxes but regular paper mail, too), these shipping services are SO untrustworthy and unreliable.  The thought of someone buying something from me online and then me having to entrust it to DHL or FedEx or UPS or, god forbid, USPS makes me very uneasy because I know how ridiculous they are.  ALL OF THESE PLACES need to do something about the poor level of customer service they provide.

There are things the seller can do (among them avoiding FedEx Smart Post and UPS Sure Post like the plague), but once the package leaves the seller's hands, there's really not much that can be done, and that's when the trouble starts.

USPS: do better!

Monday, December 22, 2014

Caught Up!

I'm almost always behind on logging my polish supply purchases, and I only log the glitter/pigments that I buy.  I need to inventory the bottles, caps, beads, and brushes as well, but I will start on that after, and only after, I get completely caught up with the glitter.  As the title states I'm caught up, but only almost.  I'm expecting one more shipment of glitter before the end of the year, and once it arrives and gets logged, I'll start on getting the rest of my supplies and products in order.

My most recent glitter purchase was supposed to arrive Saturday, and of course it didn't.  It didn't come in today's mail, either, which is a complete letdown, but if the USPS is unreliable on regular days, around the holidays you can count on it to be about seven times MORE unreliable, so it's a disappointment but in no way a surprise.  I was supposed to get at least another package in the mail today, as well, and it's not here either.  Rounding out the rest of the orders I have coming in for 2014 is three four shipments of nail polish from assorted vendors, and then I honestly think that's it, for polish, for me, for a VERY long time.

It doesn't help that I'm still getting settled into the house (I've unpacked/unboxed about 1/3 of what I need to unpack), but I can't expect to be all situated overnight.  Even the moving company gives us sixty days to file a claim because they know how long unpacking takes.  But I digress.  I no longer have the HUGE loft I was working with at my last house, and this time, I only have a small spare bedroom to serve as my studio and office, so getting it into order will be a challenge, but I'm up for it.  Once I can get my workspace figured out (which I plan to do before the year is out) then things will start to fall into place on their own.

I meant what I said about not buying as much nail polish anymore.  I have SO many--I mean, SO many untried polishes and I need to wear them, as many of them as possible, before investing in more.

Some nail polish bloggers log all of their nail polish.  I haven't done this and don't plan to do it for several reasons, the main one of which is because I honestly believe it would take forever.  I have so. Much. Polish.  But I'm going to slow down.  This time next year I plan to have the same amount!


A ban?  Maybe.  Probably.  More like a moratorium, I guess.  We'll see.

Wednesday, December 17, 2014

Ouch! Broken Glass!

While there was joy in getting all my nail polish and supplies back, there was NO joy whatsoever in seeing that so many of my empty polish bottles had suffered during the move.  A cursory glance when I opened up one of the boxes housing empty bottles told me that AT LEAST 1/4 of the bottles in that box had been broken.  When I brought this matter to the attention of the guy in charge of the movers, he assured me that not much could be done, since the bottles were moved in the container they were originally shipped to me in.


So much broken glass!  This is a problem I've never really encountered before, so I'm trying to figure out the best way to handle this.  I'm planning to just throw them all away.  I don't want to "play" with broken glass, whether it's trying to fish out the whole bottles from the wreckage of broken ones, or whether it's trying to clean glass shards and pieces out of the whole bottles.

So while I do have dozens of other bottles that didn't break, I'm going to need to replace the dozens that did break.  I really liked the bottles I'm going to have to discard, but I ordered them from another country (Canada, I believe) and of all the suppliers I've used for bottles, that company was one of the more difficult to work with, as far as shipping was concerned.  So, I've been looking around at other suppliers and in the past few days I've ordered "samples" of empty nail polish bottles from about three different sources I haven't used before.  Once the new ones come in and I test them out, I'll decide to either order more of them in bulk, or order more bottles in bulk from one of the suppliers I'd used in the past.

Wednesday, December 10, 2014

Red and Sparkly

One of my favorite types of glitter topcoats to make is holo glitter, especially if it's multi-colored.  In my opinion, it looks good with ANY color underneath.

This is my go-to red, Revlon Red.  The glitter mixture is assorted sizes of tiny hex glitter in metallic and holo colors!

I also had Revlon Red and this multi-holo glitter applied to my toes yesterday during my pedicure.  The technician said it looks just like Christmas!


Speaking of which, the next time I post, I hope to have some true Christmas creations to show!

Thursday, December 4, 2014

Reunited...and it Feels So Good!

The movers are here right now--they're delivering our possessions to our new home.

This means that I get to have, look at, and play with all of my nail polish again!

Of course, everything is still boxed away as I type, and some of the boxes I can't even get to, there are so many of them, but I'll be spending the next few days unpacking polish (as I locate the boxes, we had over 16,000 lbs of household goods and I'm sure my polish alone weighed HUNDREDS of pounds, so you can imagine how many boxes that is) and deciding which ones to wear next.

I've bought polish over the past few weeks--probably more bottles than I needed to.  But I take that back--you can never have too much polish!

I also have two shipments of glitter coming in from two different sellers, as well as more suspension base (which I also ordered during a Black Friday sale on Etsy)!

I think I'm good on bottles, for now, but pretty soon I'll need to order more empties, as I will have over a gallon of suspension base which will call for way more bottles than I have now.


Tuesday, November 25, 2014

Something New(er)

Will be getting back on track with the updates.  So much has been going on (a relocation) and I've been sort of...discombobulated.  Due to the move, almost ALL of my polish is in storage, as well as my polish-creating supplies, so I've been limited as to what I can do.  Since I knew I'd be removed from my personal belongings for WEEKS (four weeks and counting as of now, and I might not see my stuff again for at least two MORE weeks), I pre-filled eight bottles with suspension base and mixing beads, and I kept all my glitter with me so that I could play.

This is something I whipped up in the meantime.  I like it.  It went on a little...thick and sticky/goopy, but a nice topcoat of Seche Vite fixed any issues and it hardened up quite nicely!

This is my latest:


Suspension base, orange, white, and green glitter, and green shimmer powder.  I think the shimmer powder made it a bit thicker than I wanted it to be.  Next time I'll have to use less.  The white glitter consists mainly of tiny diamond shapes.  

I like it! 

It's two coats, on top of two coats of Orly's Highlight, which is a putty type of taupe color, an opaque creme.

Monday, November 3, 2014

Happy Halloween by way of The Haunted Mansion

The bad news: I just left my home of the past three years for the unknown!  I don't know where I'm going next or when I'm getting there.

The good news: I found some nail polish I really like...

Spent the previous week in Orlando, having a little Halloween-themed fun.  I decided to go for Mickey's Not So Scary Halloween Party, which coincided with another favorite Disney event of mine: the Epcot International Food and Wine Festival. 

I was able to sample tasty food, beer that REALLY hit the spot on a hot fall day, and lots of sweets and treats, a must for Halloween.  I also found nail polish that I didn't even know existed, the Haunted Mansion nail polish collection!  When I saw these in the gift store near the Mansion I had to buy not one, but two!


I don't have many colors like these in my nail lacquer collection, if memory serves me correctly.  They're dark, but shimmery colors, and I know they'll look interesting worn.

As an aside, I was ALSO able to FINALLY get my hands on a set of mini Pop of Minnie nail polishes, and a couple of other Beautifully Disney mini sets!

Friday, September 19, 2014

Faved!

Not much in this post, but I just thought I'd share with you some of my favorite creations from the past few months!  I never got around to naming or labeling these, but I did wear each of them a couple of times, and I must say, I liked them a lot!

Here they are below, as they appeared on my Instagram.

The first is based on a deck of cards.  Red, black, and white are common colors found in a standard deck of cards, and so are the suits--diamonds, spades, hearts, and clubs!  You can see all these shapes in the polish, along with tiny square and small hex shaped glitter, but the fun thing about them is the colors of the suits are untraditional!  There are white clubs, black diamonds, red spades...


I didn't name this one either.  It's pink and black and red and white--the pink glitter is in varying shades, and it's an homage to Minnie Mouse.  I added pink, black, and red "Mickey Mouse head" glitter shapes, and there are bar glitters in black and hot pink, as well as an assortment of circle, star, and hex glitters in shades of pink, white, black, and red! 


Below is one that consists solely of larger glitter shapes in all colors--stars, clubs, hearts, diamonds, skulls, flowers, etc.  I didn't give it a name, but I still love to wear it!  I basically call this nail art in a bottle.


 This one I will did a post about.  Large hex glitters in various bold, bright, summery colors--just right for spring and the coming summer!

Monday, June 30, 2014

Neutral + Sparkle!

Sometimes I like to wear a very understated color on my nails, but I still want them to sparkle.  This is where neutrals come in!  I don't wear neutrals often, but when I do I find they make an excellent background color for many glitters.  In this case, it's a holographic metallic chunky glitter topcoat I made several months ago.


The neutral--which is, of course, too light for my skin tone to be a true nude--is Brain Power by Formula X for Sephora.  I really like this color, and the Formula X line is a new and increasing favorite of mine as well.  I've mentioned that glitter typically peels off my nails in whole pieces, but this never happens when I use "The Formula."  Sephora has developed a set that works with their Formula X polishes, and the set consists of a nail prep/cleaner, a base coat, a color of your choice (complimentary), and a top coat.  I use my glitter topcoat after the nail color and before the Formula X topcoat, and it wears...and wears...and wears.  I don't have to worry about chipping or the polish peeling off!  I usually have one set in use and a backup; this is the backup (less the bonus polish, in this set it was a color called Extreme)


This is certainly one solution if you find that glitter manicures peel from your nails all too easily!

Sunday, June 29, 2014

New Summery Multi-Dot Topcoats

I've been making topcoats where all the glitter is the same size and shape for a while now (such as my homage to Minnie Style).  However, I've been seeing more and more of these polishes available commercial nail polish companies lately.  I have even purchased a few from Ciaté, Hard Candy, and Finger Paints.  However, it's always more fun and fulfilling for me to make my own!

This weekend I wanted to explore bright, summery colors.  As shown below, the polish with smaller glitter has red, hot pink, yellow, light orange, light blue, and light green hexes.  The polish with the larger glitter contains bright red, light blue, light green, pale green, yellow, and light yellow hexes.  Both are so pretty, and I've already worn them both!


In fact, right now, I'm wearing the one on the left.


This one was relatively easy to apply, and since I changed suspension base brands a couple months ago, I was able to get a good amount of glitter on the brush at once.  As a result, what is pictured is one coat over a reddish-orange L.A. Girl Disco Brites polish.

Friday, June 27, 2014

Four Years?

I've been blogging about nail polish and manicures for four years, but I simply never bothered to put the word out about it or advertise for it.

One reason was because I didn't know how long and how often I'd update, or whether I'd even keep this as a polish-related blog period.  But I've been around awhile, and I'll probably be around longer, and let's face it, I like coming up with manicure designs, glitter topcoats, and talking about nail polish, of which I own entirely too much.  The polish blogging world is over-saturated, with everyone and her mother posting manicures, but I like to think I offer something at least a little different: tips about designing your own nail polish topcoats, and ideas of how to wear them once you get them made.  I halfway want to include other topics on this blog, but for now, I guess it will be polish, and finally I'm going "live."  Honestly, I have fun doing what I do, and I love writing about what I do, and...well...I don't mind "sharing."

And speaking of sharing, there will be a nice giveaway when I reach one-hundred followers, so if you know anyone who likes all things manicure, spread the word!

In the meantime, here to visit and follow us on Facebook!

Tuesday, June 24, 2014

Something for the Patriotic

I was at a local Walmart not too long ago, and I saw a collection of Independence Day themed nail polish.  The Salon Perfect line, sold at Walmart, had released a limited edition set of nail polish colors and glitter topcoats all in shades of red, white, and blue!

 A press photo for the collection, called "Paint the Town Red White & Blue" (my main concern, naturally, being the glitter topcoats) are below:
At the store, it was the glitter topcoats I surreptitiously took a photo of:
I decided not to purchase them, although I'd been wanting another red, white, and blue topcoat for awhile now.  I'd been toying with the idea of buying the one from Sephora, but to tide me over I made my own last week--but more about that later.

Since I have a ton of glitter already, and of course hundreds of empty bottles, caps, brushes, and suspension base at my disposal, I decided to make my own set of red, white, and blue topcoats, inspired by both this one from Sephora called Liberty:
and the set of six red, white, and blue glitter topcoats from Salon Perfect.

Here they are, yet unnamed; I finished designing them two days ago:
The first one shown was made a week or so ago while I was still deciding whether or not to buy Liberty.  The other five I made over the space of a day.  Click on the photo to enlarge.

I need to come up with names for these, but so far, I'm very pleased with them!  

Going from l - r, the polishes contain:

1.   tiny matte red hex glitter, matte blue star-shaped glitter, tiny white matte square glitter, matte bar glitter, tiny matte white hex glitter, tiny matte blue hex and square glitter, and holographic shimmer glitter

2. a ton of equal-sized tiny matte white, matte blue, matte red, and holo red glitter

3.  tiny blue, periwinkle, red, and white stars and holographic shimmer

4.  metallic red, blue, and silver bar glitter

5. holographic red, silver, and blue moon and star glitter, and multi-colored, multi-sized holographic glitter (the only polish that contains colors other than red, white, blue, or silver)

6.  tiny matte red bar glitter, tiny matte white rectangle glitter, and tiny matte square bright blue glitter

I really LOVE these and I can't wait to wear them in flag-themed manicures!

Sunday, April 20, 2014

Happy Easter

Since I was in the creative mood recently, I made four polishes for Easter.  Actually, I've designed six total, but I've only labeled and photographed four of them. 

I call them Psychadeleaster, Bouquet of the Day, Pastel Prayer, and Easter's Peach.


When I was a kid, my mom would always see to it that I be assigned and memorize an Easter speech, which was usually just a resurrection-themed poem.  I added peach, pink, iridescent, and holo glitters and made a pun!  It looks like I added dark/black glitter to this one, but that's actually tiny sky-blue holographic squares that, of course, didn't photograph too well.


Bouquet of the Day is made with assorted shapes and shades of tiny pink and white matte, satin, and holo glitter, as well as large neon and soft pink flower shapes.


Pastel Prayer consists of tiny blue hex, larger yellow yellow hex, green circles, and pink shreds--all in pastel shades of matte glitter.
 

I think Psychadeleaster is my favorite, but that's because I'm a fan of bold, bright colors.  It has black, white, and neon pink matte bar glitter, white diamond glitter, and various tiny neon and pastel matte glitters!
 

I made these last week, and I've worn both Pastel Prayer and Psychadeleaster already.  I hope to be able to try Easter's Peach and Bouquet of the Day soon!

Sunday, March 2, 2014

Semi-Organized

I'm tired and I need to go to bed!

I spent a couple of hours since my last post trying to get my glitter into SOME kind of order.  I'm not where I want to be, but I'm better than where I was!  The thing is, I only have two plastic drawer sets, in two different sizes, each with three drawers.  So I had to figure out how to sort the glitter, and I came up with an idea to group similar colors together:


Eventually I'd like to separate them into individual colors, but for now this will do!

Also, I still need better storage options for the polish base, the mixing beads, and empty bottles.  But it feels good to have at least gotten the glitter started!

Calling Myself Out!

I'd been keeping track of all the glitter I buy, but I'd slacked off on keeping an inventory.  So this weekend I sat down and, over a course of three different sittings, logged my last FOUR glitter hauls.

When I finished, I realized I have over 300 unique types of glitter.

At this point I need to slow down.  I had asked for a custom listing from an Etsy glitter seller last week, and as of yet, I haven't heard anything from this store owner, and I'm taking that as a sign that I don't need to buy anything else, since this seller usually follows up relatively quickly.

I'm at the point where I have way more glitter than I do bottles to put it in and base to mix it with.  Because I tend to buy in spurts--this month I might buy glitter, the next month I might buy bottles, and then I might not buy anything else again for MONTHS--I'll more than likely hold off on getting any more glitter for a few months.  What I want to do is try to at least use up all my inventory of bottles and base, but I have to be honest with myself: that will be a challenge.  I'm iffy about sitting down and forcing myself to blend, and then swatch, and then photograph, but I still like to do those things.  I just haven't been doing them as much lately.

I'm also iffy with manicures as of late.  Whole days will go by where I might not change my polish lately, and that used to almost NEVER happen.  Yet, I've got some ideas for manicures inspired by other fingertips I've seen around the Internet, so I've been making notes.  I did two mini polishes yesterday inspired my my ideas, and I plan to do a couple more to complete the "set."

Also, I've been getting interested in stamping again.  I was doing it pretty heavily about five or six years ago.  I had, over a period of years, bought a lot of Konad plates and polishes.  But I slowly lost interest.  I kept all the stuff, so that's good.  I'll have to play around with stamping more.  I recently ordered new plates and I can't wait to use them.

I've also found myself interested in decals.  But in typical "me" fashion, I don't want to buy decals that others are selling, so I decided to order some inkjet water slide decal paper and make my own decals.  That should arrive in the next week or so, along with my plates. 

I can't believe it's already March.  It doesn't seem like four months ago that I posted last, but I guess it has been.  Time really flies, but I do hope to update more frequently going forward.

My next step as far as all this nail-stuff is concerned is getting organized.  I'm to the point where I have way too much glitter to keep it in two cardboard boxes.  I need to devise some kind of system for them.

Monday, February 10, 2014

A Pop of Minnie!

Anyone who knows me well knows that, despite my age, I'm a big fan of Disney!  I have actually  purchased various collections of Disney inspired or affiliated nail polished in the past, and I'm excited to say that there's a new one out that I can't wait to get my hands on!  If you're familiar with the Beautifully Disney line, you may be aware of their various makeup collections, which include things like polish and eye shadow.  While I don't have any of the Beautifully Disney cosmetics yet, that will change as soon as these go on sale online, since even though they're on sale at the parks, they haven't been released yet.

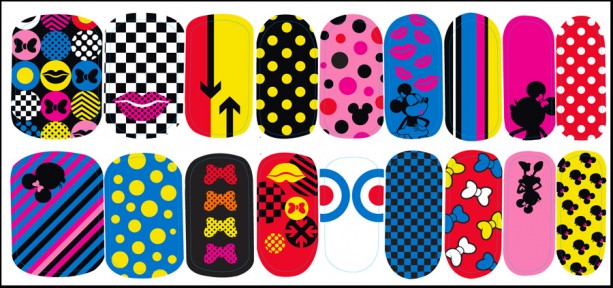
These are official press photos of the lineup, called Pop of Minnie, and they're full of bright colors!


I find myself, for obvious reasons, more concerned with the nail polish, emery boards, and nail decals than the other cosmetics, although the pouch looks cute, too--I might have to snatch that up as well!

The colors are very inspiring!  I've always been a fan of bold, bright hues, whether it's my clothing or on my nails, and since I just couldn't WAIT until I purchase these items, I decided that this would be a good time for a Pop of Minnie inspired mani!

As luck would have it, I just got a new order of stamping plates in the mail a few days ago.  There were a couple of Disney themed plates in my haul, so I pulled those out and got to work!

I decided to get inspiration from the colors and patterns of the nail polish, decals, and packaging.  This was so much fun, and I regret that I only had ten fingers to play with!  Here are five of them, based on my interpretation of some of the accessories:


It's very hard to tell from a photo of a bottle of nail polish what the exact, real-world color would be.  But I love the pink and orange from the Pop of Minnie polish set, so I picked out a bold magenta and orange from my own stash.  The orange is a Sephora by OPI mini, and the magenta is a Color Club, and both are unlabeled.  On the orange, I decided to use a bold-yellow all-over fishnet pattern (index finger).  On the magenta, I decided to stamp fancy blue and yellow stripes (pinkie).  I used the same magenta on my thumb, and stamped Minnie's face on top.  I loved the blue color scene throughout the collection, and featured in the decals.  So I painted my ring finger a bold blue from Ruby Kisses called Blues Clue, and I stamped a mini Minnie over it.  I also love the bright pink used on some of the nail appliques, so I painted my middle finger a bright pink, and I used my Minnie Style-inspired pink, red, and white dotted glitter topcoat over it.

Here's a slightly different photo, using flash, at a higher resolution:


So far I consider Pop of Minnie nail products to be a must-purchase, and I'll get them as soon as I can!  Until then, however, I'll continue to drool over the bright color palette of black, white, yellow, blue, magenta, pink, orange, yellow, and green--and I'm sure I'll do another Pop of Minnie inspired mani along the way!

Friday, January 24, 2014

Really, Ciate?

As this is primarily a place where I can talk about and post pictures of the various topcoats I make, it's obvious that I like glitter.  Lots of other people do, too, and big companies are starting to capitalize on the trends that indie polish creators have been setting for years.  For example, Sephora's new Formula X line consists of plenty of topcoats that would be easy for me to dupe, and which are more than likely dupes of actual existing polishes.  I mean, you can only combine glitter and nail polish base in so many ways.

Now Ciaté is trying to cash in on the "frankening" trend with their Nail Lab kit.


I guess in theory this is a good idea--a set of glitters, suspension topcoats, and nail polishes assembled for the specific purpose of mixing and matching everything up--but for the price, it falls kind of short for me.

Ciaté is selling their kit for $65.  Other than a few inexpensive nail tools, like an emery board and dotting tool (which you can find for a dollar almost anywhere you look), they give you twelve 5-gram pots of glitter, two empty mini bottles, six mini bottles of nail polish, and eight mini bottles pre-filled with suspension base.  Sixty grams of glitter is a little more than two ounces.  I'm always buying glitter from a variety of sources, and I've never paid more than $8 per ounce.  Some places sell glitter for as little as $2 for a third of an ounce.  So comparatively, the small amount of glitter in the Ciaté kit just isn't worth a whole lot of money.  What about the suspension base?  It's roughly a dollar an ounce.  Ciaté gives you eight .10 ounce pre-filled bottles.  That's not even a whole ounce.  So we have maybe five dollars (and I'm being generous) worth of tools, a dollar's worth (and again I'm being generous) worth of suspension base, and less than $15 worth of glitter.  We're up to maybe $21.  But the kit costs $65!  Granted, the packaging is nice.  And then you have to look at the fact that they include mini bottles of nail polish.  But is the packaging and nail polish--of which you get around .6 ounces total--worth forty dollars?  I understand you're paying for the convenience factor of having everything assembled for you, but honestly, you can buy "frankening" kits from Etsy for much more reasonable rates.  And while the packaging is nice--I really LOVE the gold colored storage box--I can't say everything is worth what they're charging for it.
But it's been a good seller, having sold out on the Sephora website at least once.  A lot of people seem to either want it or think it might make a good gift, and I agree.  And I might have even bought it myself if I didn't have so much invested in my own supplies!

Info:

What it is:
A kit containing everything for the ultimate at-home nail studio.

What it does:
Every nail tech needs a tool kit. This is the ultimate at-home setup for creating hundreds of custom nail looks. Here, you’ll find all the essential elements to help you create and master pro nail styles, including a dotting tool, ombre sponge, and striping brush, plus Ciaté founder Charlotte Knight’s favorite glitter recipes and nail-look show cards to inspire and help you create your own signature Ciaté look. These polishes are crafted with a specialty suspension top coat technology and super bendable formula for lasting, silky polish and salon-quality color. Professional-grade glitter creates a photo-shoot finish and dazzling bespoke shades ensure nail art like no other. Crown your creation by giving it a name with the enclosed nametags—perfect for creating a special gift.

This set contains:
- 6 x 0.1 oz Nail Pots in Mistress, Rain Coat, Amazing Gracie, Power Dressing, Pillow Fight, Ferris Wheel
- 7 x Recipe card
- 7 x Get The Look cards
- 8 x 0.1 oz Suspension Top Coat
- Glitter Pot in Splash, Tease, Bombshell
- Flitter Pot in Prism, Stiletto, Galactic
- Sparkle Pot in Nightfall, Ignite, Crowd Surf
- Shimmer Pot in Pout, Day Dream, Pirouette
- 2 x 0.1 oz Empty Mixing Paint Pots
- Petri dish
- Funnel
- 2 x Mini test tube
- Name tags
- 6 x Silver shaker balls
- Mini file
- 2 x Nail buffer
- Paint brush
- Stripper brush
- Dotter
- Scoop 
I generally love Ciaté nail lacquer, and I have quite a few bottles, mostly in mini-sized sets.  They've put out several kits I've enjoyed, as well, like the foil kit and the feather kit.  However, the majority of their kits are overpriced, IMO, just like the Nail Lab kit.  I've mentioned previously that you can buy nail foil VERY cheaply from a variety of sources; Ciaté does do a good job, however, of packaging everything together so that you don't have to buy from a variety of sources to get one look.

As far as the Nail Lab is concerned, if you're new to making glitter topcoats and don't want to source enough materials to make up a starter kit from a variety of sellers, this could be a good way to experiment and see if you'll enjoy making your own polish. However, for those of us who do this as a hobby, it really doesn't offer anything we don't already have on hand.