Sunday, March 2, 2014

Semi-Organized

I'm tired and I need to go to bed!

I spent a couple of hours since my last post trying to get my glitter into SOME kind of order.  I'm not where I want to be, but I'm better than where I was!  The thing is, I only have two plastic drawer sets, in two different sizes, each with three drawers.  So I had to figure out how to sort the glitter, and I came up with an idea to group similar colors together:


Eventually I'd like to separate them into individual colors, but for now this will do!

Also, I still need better storage options for the polish base, the mixing beads, and empty bottles.  But it feels good to have at least gotten the glitter started!

Calling Myself Out!

I'd been keeping track of all the glitter I buy, but I'd slacked off on keeping an inventory.  So this weekend I sat down and, over a course of three different sittings, logged my last FOUR glitter hauls.

When I finished, I realized I have over 300 unique types of glitter.

At this point I need to slow down.  I had asked for a custom listing from an Etsy glitter seller last week, and as of yet, I haven't heard anything from this store owner, and I'm taking that as a sign that I don't need to buy anything else, since this seller usually follows up relatively quickly.

I'm at the point where I have way more glitter than I do bottles to put it in and base to mix it with.  Because I tend to buy in spurts--this month I might buy glitter, the next month I might buy bottles, and then I might not buy anything else again for MONTHS--I'll more than likely hold off on getting any more glitter for a few months.  What I want to do is try to at least use up all my inventory of bottles and base, but I have to be honest with myself: that will be a challenge.  I'm iffy about sitting down and forcing myself to blend, and then swatch, and then photograph, but I still like to do those things.  I just haven't been doing them as much lately.

I'm also iffy with manicures as of late.  Whole days will go by where I might not change my polish lately, and that used to almost NEVER happen.  Yet, I've got some ideas for manicures inspired by other fingertips I've seen around the Internet, so I've been making notes.  I did two mini polishes yesterday inspired my my ideas, and I plan to do a couple more to complete the "set."

Also, I've been getting interested in stamping again.  I was doing it pretty heavily about five or six years ago.  I had, over a period of years, bought a lot of Konad plates and polishes.  But I slowly lost interest.  I kept all the stuff, so that's good.  I'll have to play around with stamping more.  I recently ordered new plates and I can't wait to use them.

I've also found myself interested in decals.  But in typical "me" fashion, I don't want to buy decals that others are selling, so I decided to order some inkjet water slide decal paper and make my own decals.  That should arrive in the next week or so, along with my plates. 

I can't believe it's already March.  It doesn't seem like four months ago that I posted last, but I guess it has been.  Time really flies, but I do hope to update more frequently going forward.

My next step as far as all this nail-stuff is concerned is getting organized.  I'm to the point where I have way too much glitter to keep it in two cardboard boxes.  I need to devise some kind of system for them.

Monday, February 10, 2014

A Pop of Minnie!

Anyone who knows me well knows that, despite my age, I'm a big fan of Disney!  I have actually  purchased various collections of Disney inspired or affiliated nail polished in the past, and I'm excited to say that there's a new one out that I can't wait to get my hands on!  If you're familiar with the Beautifully Disney line, you may be aware of their various makeup collections, which include things like polish and eye shadow.  While I don't have any of the Beautifully Disney cosmetics yet, that will change as soon as these go on sale online, since even though they're on sale at the parks, they haven't been released yet.

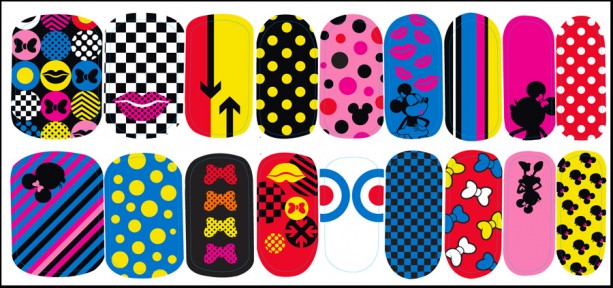
These are official press photos of the lineup, called Pop of Minnie, and they're full of bright colors!


I find myself, for obvious reasons, more concerned with the nail polish, emery boards, and nail decals than the other cosmetics, although the pouch looks cute, too--I might have to snatch that up as well!

The colors are very inspiring!  I've always been a fan of bold, bright hues, whether it's my clothing or on my nails, and since I just couldn't WAIT until I purchase these items, I decided that this would be a good time for a Pop of Minnie inspired mani!

As luck would have it, I just got a new order of stamping plates in the mail a few days ago.  There were a couple of Disney themed plates in my haul, so I pulled those out and got to work!

I decided to get inspiration from the colors and patterns of the nail polish, decals, and packaging.  This was so much fun, and I regret that I only had ten fingers to play with!  Here are five of them, based on my interpretation of some of the accessories:


It's very hard to tell from a photo of a bottle of nail polish what the exact, real-world color would be.  But I love the pink and orange from the Pop of Minnie polish set, so I picked out a bold magenta and orange from my own stash.  The orange is a Sephora by OPI mini, and the magenta is a Color Club, and both are unlabeled.  On the orange, I decided to use a bold-yellow all-over fishnet pattern (index finger).  On the magenta, I decided to stamp fancy blue and yellow stripes (pinkie).  I used the same magenta on my thumb, and stamped Minnie's face on top.  I loved the blue color scene throughout the collection, and featured in the decals.  So I painted my ring finger a bold blue from Ruby Kisses called Blues Clue, and I stamped a mini Minnie over it.  I also love the bright pink used on some of the nail appliques, so I painted my middle finger a bright pink, and I used my Minnie Style-inspired pink, red, and white dotted glitter topcoat over it.

Here's a slightly different photo, using flash, at a higher resolution:


So far I consider Pop of Minnie nail products to be a must-purchase, and I'll get them as soon as I can!  Until then, however, I'll continue to drool over the bright color palette of black, white, yellow, blue, magenta, pink, orange, yellow, and green--and I'm sure I'll do another Pop of Minnie inspired mani along the way!

Friday, January 24, 2014

Really, Ciate?

As this is primarily a place where I can talk about and post pictures of the various topcoats I make, it's obvious that I like glitter.  Lots of other people do, too, and big companies are starting to capitalize on the trends that indie polish creators have been setting for years.  For example, Sephora's new Formula X line consists of plenty of topcoats that would be easy for me to dupe, and which are more than likely dupes of actual existing polishes.  I mean, you can only combine glitter and nail polish base in so many ways.

Now Ciaté is trying to cash in on the "frankening" trend with their Nail Lab kit.


I guess in theory this is a good idea--a set of glitters, suspension topcoats, and nail polishes assembled for the specific purpose of mixing and matching everything up--but for the price, it falls kind of short for me.

Ciaté is selling their kit for $65.  Other than a few inexpensive nail tools, like an emery board and dotting tool (which you can find for a dollar almost anywhere you look), they give you twelve 5-gram pots of glitter, two empty mini bottles, six mini bottles of nail polish, and eight mini bottles pre-filled with suspension base.  Sixty grams of glitter is a little more than two ounces.  I'm always buying glitter from a variety of sources, and I've never paid more than $8 per ounce.  Some places sell glitter for as little as $2 for a third of an ounce.  So comparatively, the small amount of glitter in the Ciaté kit just isn't worth a whole lot of money.  What about the suspension base?  It's roughly a dollar an ounce.  Ciaté gives you eight .10 ounce pre-filled bottles.  That's not even a whole ounce.  So we have maybe five dollars (and I'm being generous) worth of tools, a dollar's worth (and again I'm being generous) worth of suspension base, and less than $15 worth of glitter.  We're up to maybe $21.  But the kit costs $65!  Granted, the packaging is nice.  And then you have to look at the fact that they include mini bottles of nail polish.  But is the packaging and nail polish--of which you get around .6 ounces total--worth forty dollars?  I understand you're paying for the convenience factor of having everything assembled for you, but honestly, you can buy "frankening" kits from Etsy for much more reasonable rates.  And while the packaging is nice--I really LOVE the gold colored storage box--I can't say everything is worth what they're charging for it.
But it's been a good seller, having sold out on the Sephora website at least once.  A lot of people seem to either want it or think it might make a good gift, and I agree.  And I might have even bought it myself if I didn't have so much invested in my own supplies!

Info:

What it is:
A kit containing everything for the ultimate at-home nail studio.

What it does:
Every nail tech needs a tool kit. This is the ultimate at-home setup for creating hundreds of custom nail looks. Here, you’ll find all the essential elements to help you create and master pro nail styles, including a dotting tool, ombre sponge, and striping brush, plus Ciaté founder Charlotte Knight’s favorite glitter recipes and nail-look show cards to inspire and help you create your own signature Ciaté look. These polishes are crafted with a specialty suspension top coat technology and super bendable formula for lasting, silky polish and salon-quality color. Professional-grade glitter creates a photo-shoot finish and dazzling bespoke shades ensure nail art like no other. Crown your creation by giving it a name with the enclosed nametags—perfect for creating a special gift.

This set contains:
- 6 x 0.1 oz Nail Pots in Mistress, Rain Coat, Amazing Gracie, Power Dressing, Pillow Fight, Ferris Wheel
- 7 x Recipe card
- 7 x Get The Look cards
- 8 x 0.1 oz Suspension Top Coat
- Glitter Pot in Splash, Tease, Bombshell
- Flitter Pot in Prism, Stiletto, Galactic
- Sparkle Pot in Nightfall, Ignite, Crowd Surf
- Shimmer Pot in Pout, Day Dream, Pirouette
- 2 x 0.1 oz Empty Mixing Paint Pots
- Petri dish
- Funnel
- 2 x Mini test tube
- Name tags
- 6 x Silver shaker balls
- Mini file
- 2 x Nail buffer
- Paint brush
- Stripper brush
- Dotter
- Scoop 
I generally love Ciaté nail lacquer, and I have quite a few bottles, mostly in mini-sized sets.  They've put out several kits I've enjoyed, as well, like the foil kit and the feather kit.  However, the majority of their kits are overpriced, IMO, just like the Nail Lab kit.  I've mentioned previously that you can buy nail foil VERY cheaply from a variety of sources; Ciaté does do a good job, however, of packaging everything together so that you don't have to buy from a variety of sources to get one look.

As far as the Nail Lab is concerned, if you're new to making glitter topcoats and don't want to source enough materials to make up a starter kit from a variety of sellers, this could be a good way to experiment and see if you'll enjoy making your own polish. However, for those of us who do this as a hobby, it really doesn't offer anything we don't already have on hand.

Tuesday, November 5, 2013

Time Flies!

I know it's been months since I've updated.  So much has been going on!  Back in July I traveled to Montreal, and spent a short while recovering from that trip before moving onto my next venture in August, which consisted of running back and forth between cities in an attempt to land a spot on a television show.  We eventually got to tape the show, but more on that later!  Maybe.

Last week I designed a few more topcoats; pictures and swatches coming soon.  Also, I have bought almost three dozen new types of glitter, the most recent of which arrived in the mail yesterday, and I'm looking forward to incorporating them into new creations.

Stay tuned!

Saturday, June 29, 2013

Red, White, Pink: Revisited

I liked my red, pink, and white "dotted" topcoat so much that I just had to make another!  However, this time, I made a few changes.  I used metallic pink AND metallic red hexes in addition to the frosted white, matte pink, and matte red.  The difference is subtle, but still noticeable.

This is both polishes under flash.  The new version is on the left, and the original version is on the right:


This shot is no flash:


I actually did the second version (on the left) over a week ago.  Only I'm just now getting around to showing it!  I wore it the same day, but I didn't take pictures.  The next time I wear it I will.

By the way, I broke down and bought Minnie Style.  I just had to!

Comparison shot, with and without flash, of Minnie Style and the polishes it inspired:


Yet, at the end of the day, I think I like mine a little more.

Thursday, June 13, 2013

Red, White, Pink

OPI has a gorgeous polish out right now called Minnie Style.  I mentioned it here before, and posted a manicure "inspired" by it.  Made up of red and white glitter, it's different from most glitter polishes.  I thought about buying it, but being it that I already have a ton of red and white glitter, I decided to make my own version.

Minnie Style, pictured below, has matte white and metallic red hex glitter, although some people seem to have gotten bottles containing white square glitter.


And it's really pretty.

However, I decided to play around with a few glitters and I made a version that has frosted hex glitter instead of opaque, matte red hexes instead of metallic, and matte pink hex glitter.  

I swatched it over several magenta, red, and pink polishes, and I finally settled on a color to use as an undie--Party Pink by Ruby Kisses.

My version, unnamed, shown below with and without flash.


It wasn't my intent to create an exact replica, so I love the way it turned out.  It's a keeper!

Sunday, June 2, 2013

Living My Life Like It's Golden

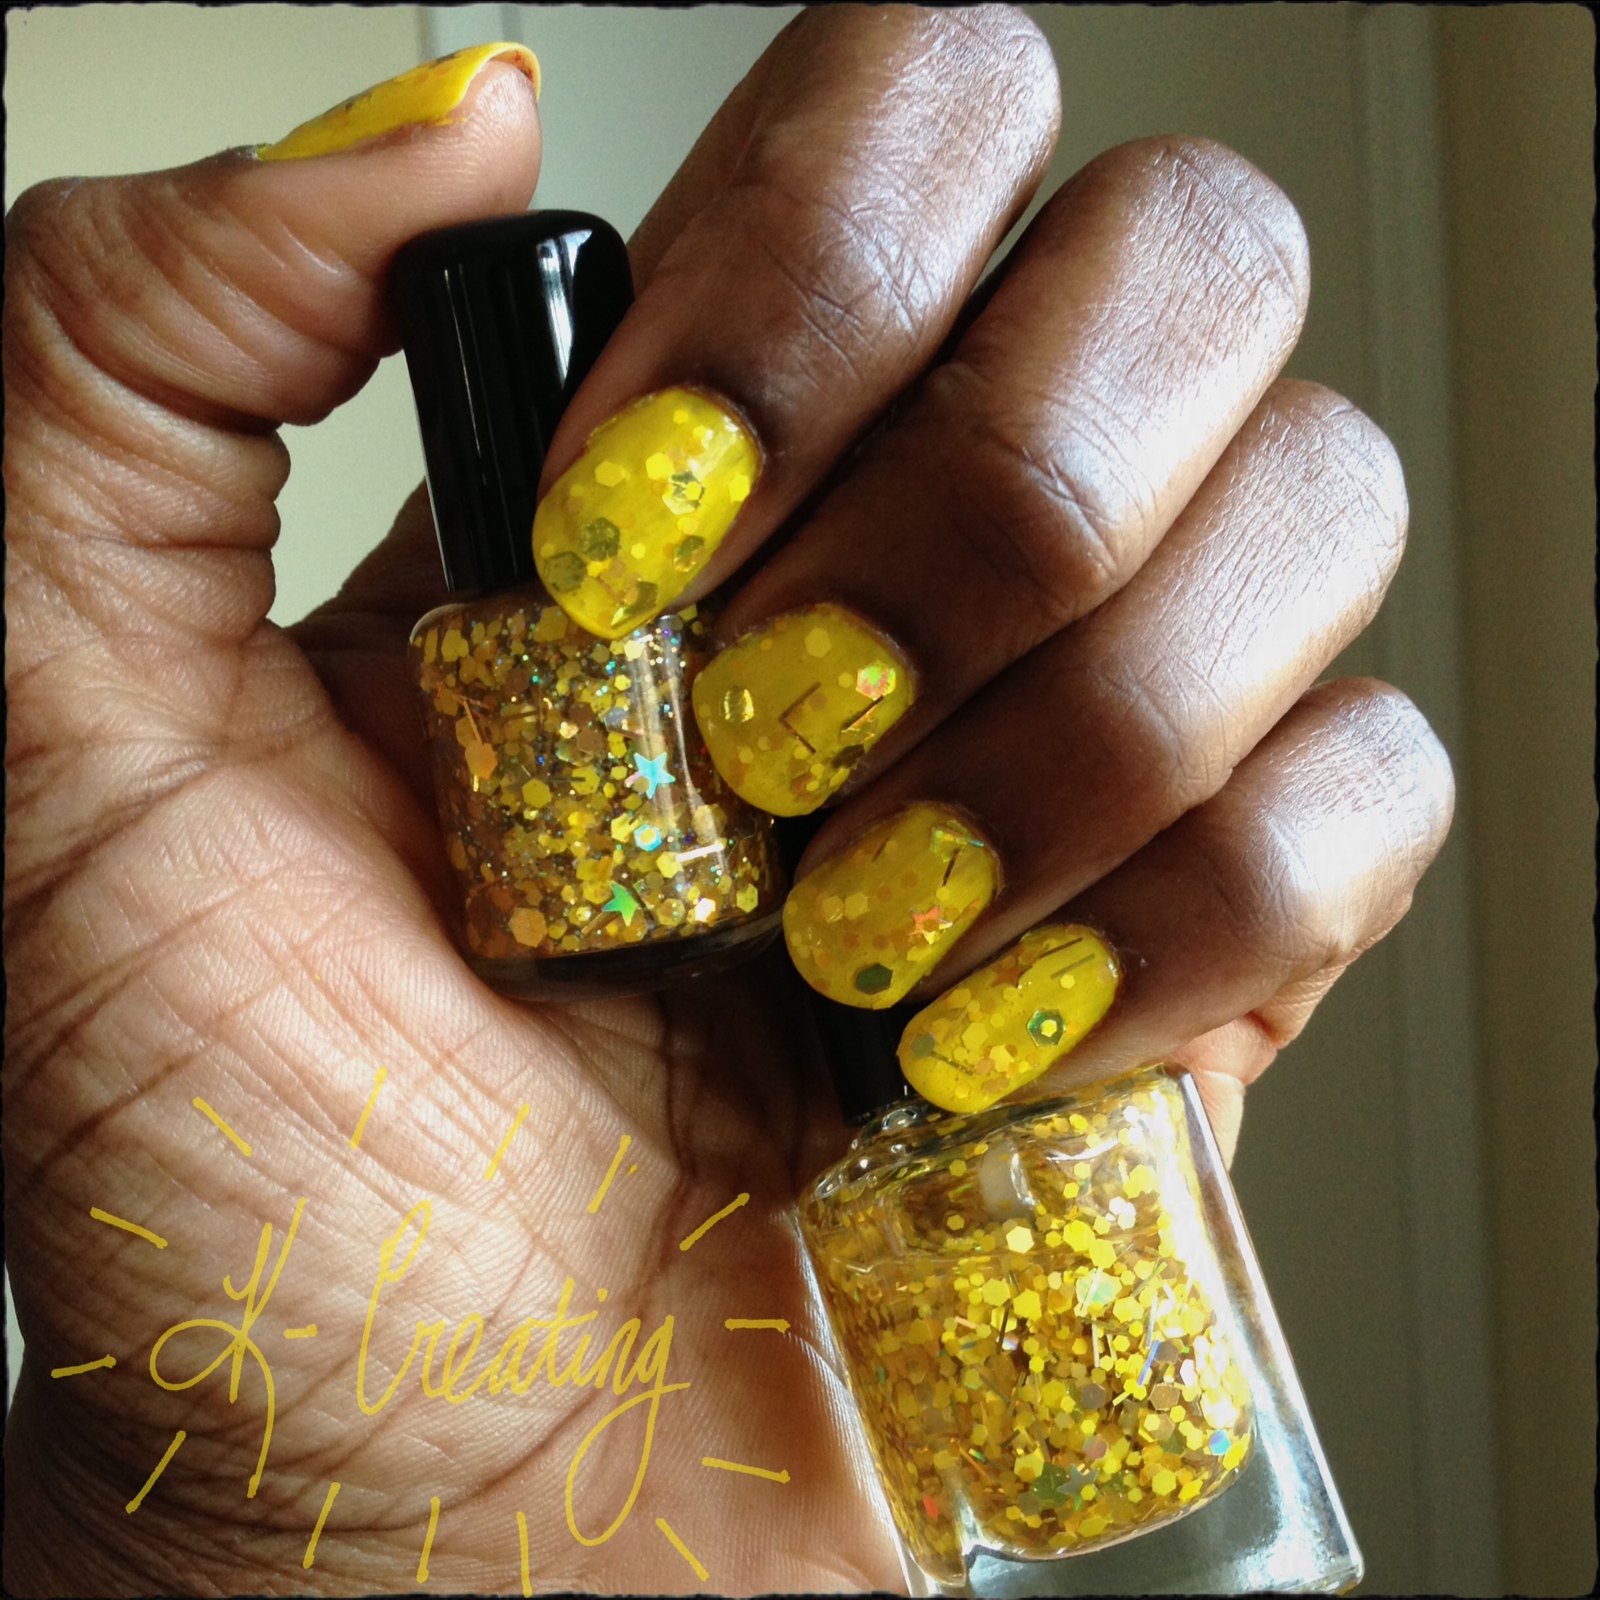
This is a gorgeous selfie, a topcoat with assorted yellow and gold glitters.  I also made a smaller version with a shimmer base; the large size has a clear base.

This is over a yellow creme by Ruby Kisses.  I like this.  A LOT!


Again, I just LOVE bright colors on my skin.  This is a winner, a definite keeper.

I wish I could always be inspired to make something so pretty!

Tuesday, May 28, 2013

Dots I Wish Were Polka

I made a selfie of one-sized, white glitter.  Hexes, although from a distance they can pass for circles.  I think I added too MUCH glitter, as it comes off quite densely from the brush onto the nail. I think it looks better when there is not as much glitter on a nail.

I also tried something that's quite common for manicures, but which is also a first for me: a duotone nail--half hot pink, half red.  I really like the way it looks under the selfie:


I'm going to have to do the duotone thing again; I really like it!

This manicure was inspired the OPI polish, Minnie Style.  It's a glitter topcoat of equally sized red, white, and pink glitter.  Although I have red, white, and pink glitter, I decided to do white glitter only.   Of course, when brushing glitter "dots" on your nail, you get random, uneven placement, which I don't find unappealing.  It's just that the dots on Minnie's dress are polka dots--evenly spaced--and the dots in my selfie can't make polka dots.

Still, I love this look so much!

Sunday, May 26, 2013

Pink and Blue Mani

I like this look...it's a pink and blue mani with an accent nail.  The topper is a selfie of course, one of my favorites, whose pictures do NOT do it justice.  It's a fun, confetti look.  One of these days when I'm not using an iPhone as a camera, I'll take a GOOD picture of this topcoat so I can show it off.  I use it so much that I guess it deserves better representation!


This is with and without flash.  The blue is one of my Disco Brites (one of my favorite collections of all time) and the pink, I'm pretty sure, is Ruby Kisses Pink Flamingo.